Mechanical Gripping Robot
Project Constraints:
The gripper must be designed and fabricated entirely from scratch and without the use of pre-made gripper designs, downloaded CAD files, or automated design tools (e.g., pre-existing STL files) outside of inspiration
The design must include both a mechanical linkage and gears to accutuate the gripping movement
The gripping action must be actuated by a stepper motor
At no point may any components, fasteners, adhesives, or devices be attached directly to the figure
During operation, the system may only be physically handled via the housing of the stepper motor. The system may be manually positioned prior to actuation, but gripping must occur autonomously without human intervention
Once the figure is successfully gripped, the entire system must be able to be lifted 2 feet off the ground without releasing or dropping the figure

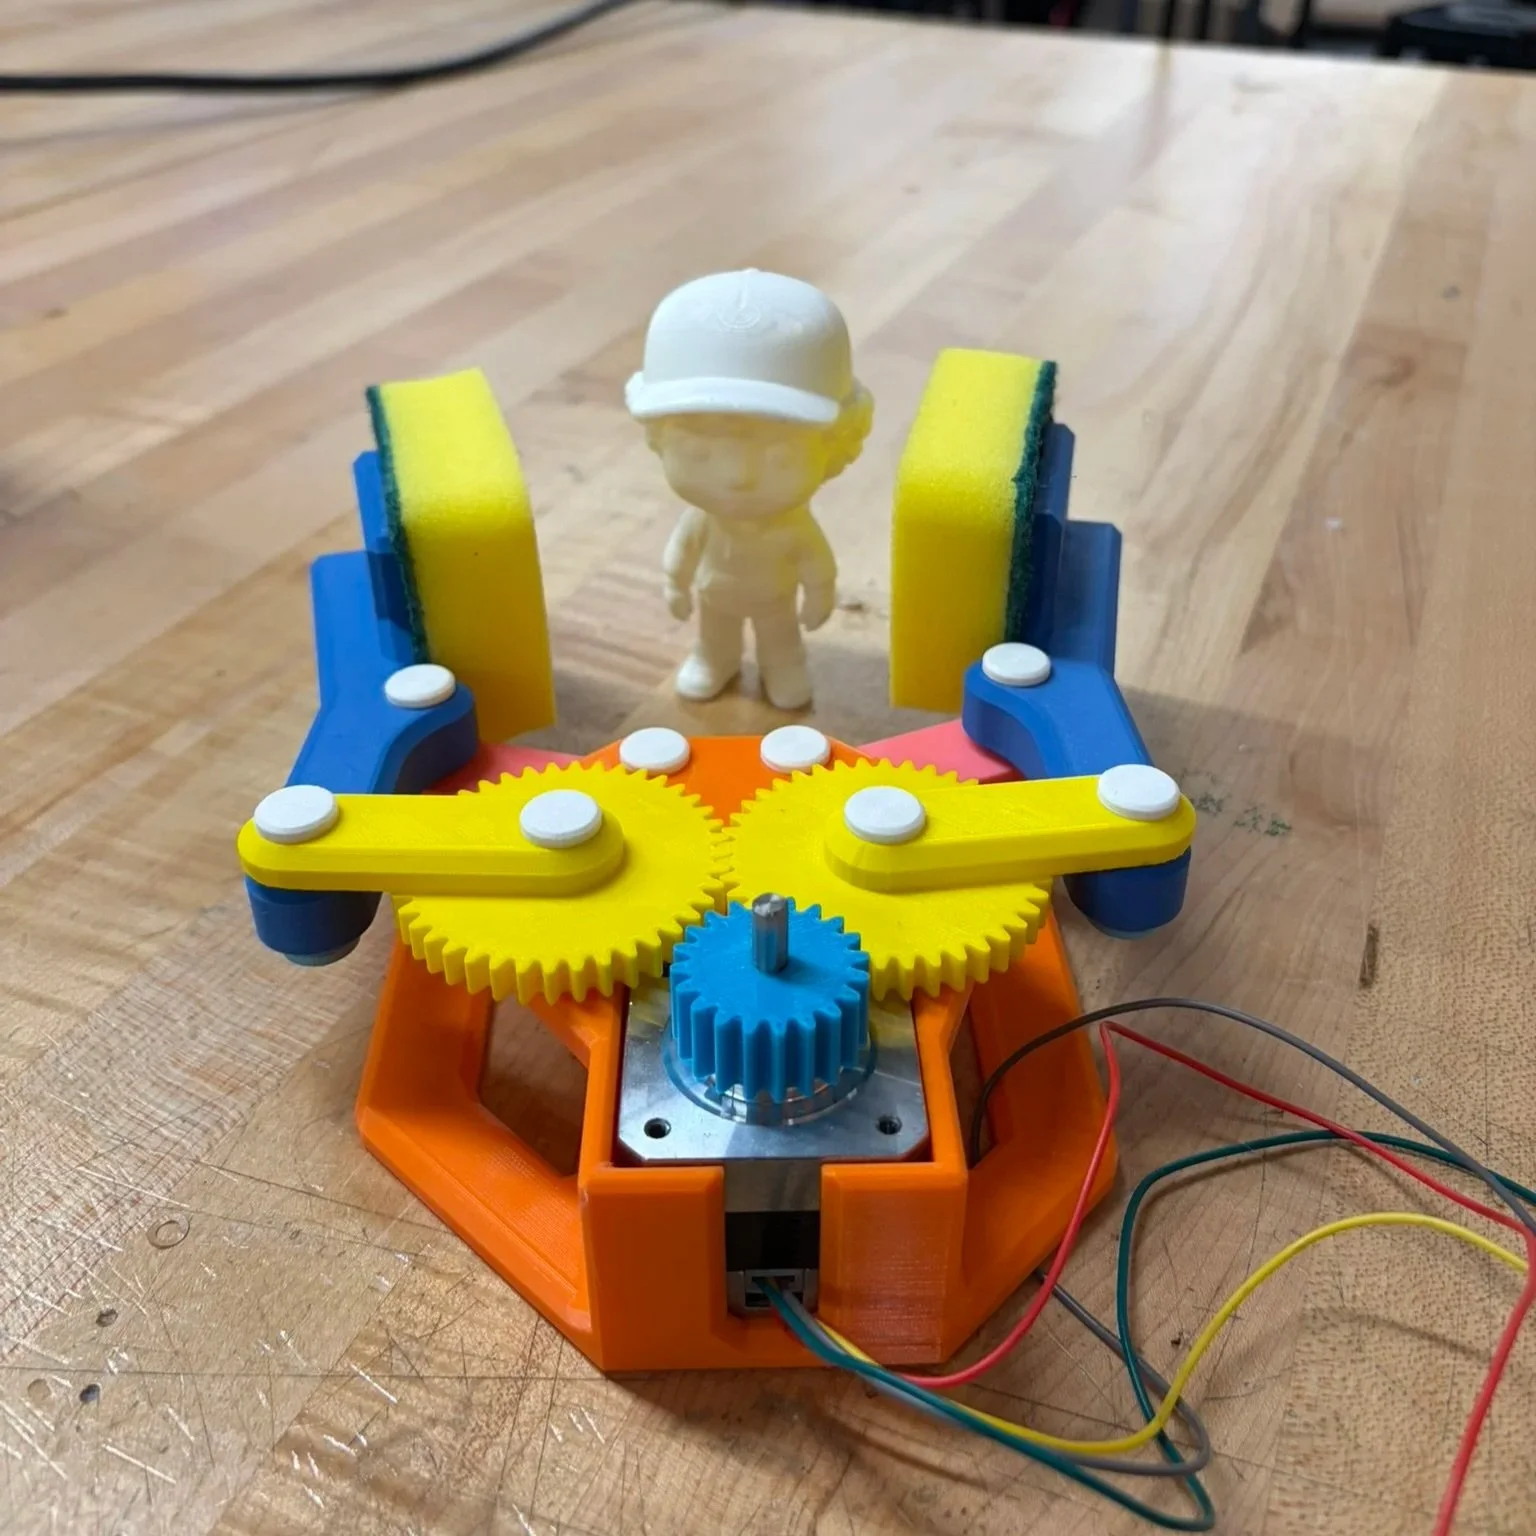
3D printed figures to be picked up by the grippers
Prototyping and Understanding Components
Prototype Design Process:
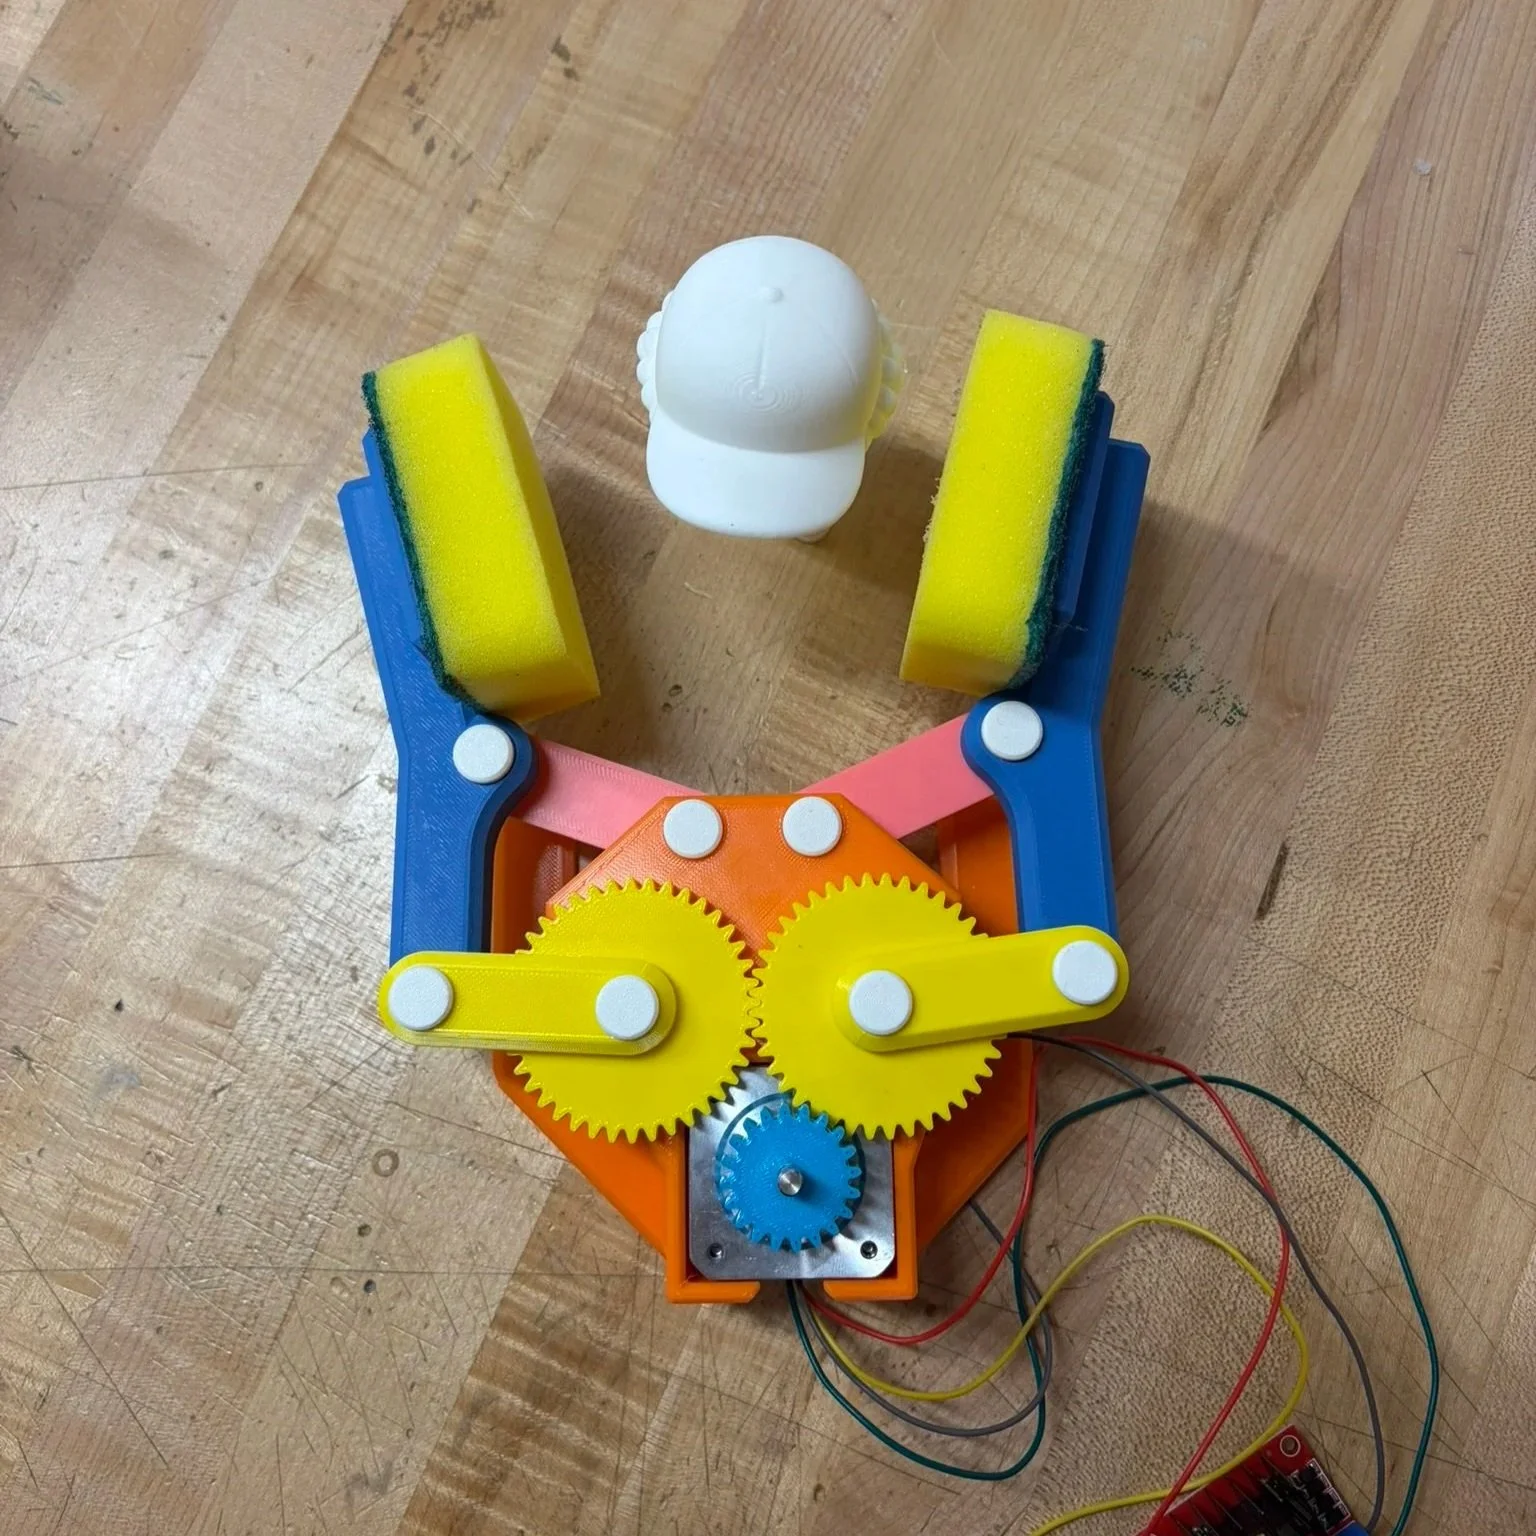
Designed with inspiration taken from simple 4-bar linkage systems found online
Actuation through a pinion gear with a 2:1 ratio which drives one linkage arm, which is interfaced with the other arm through a 1:1 gear ratio
Designed the overall geometry of the gripper, then iteratively adjusted the assembly in CAD, checking and refining the geometry until the motion followed the desired path
3D printed screws and axles hold the various arms and linkages together
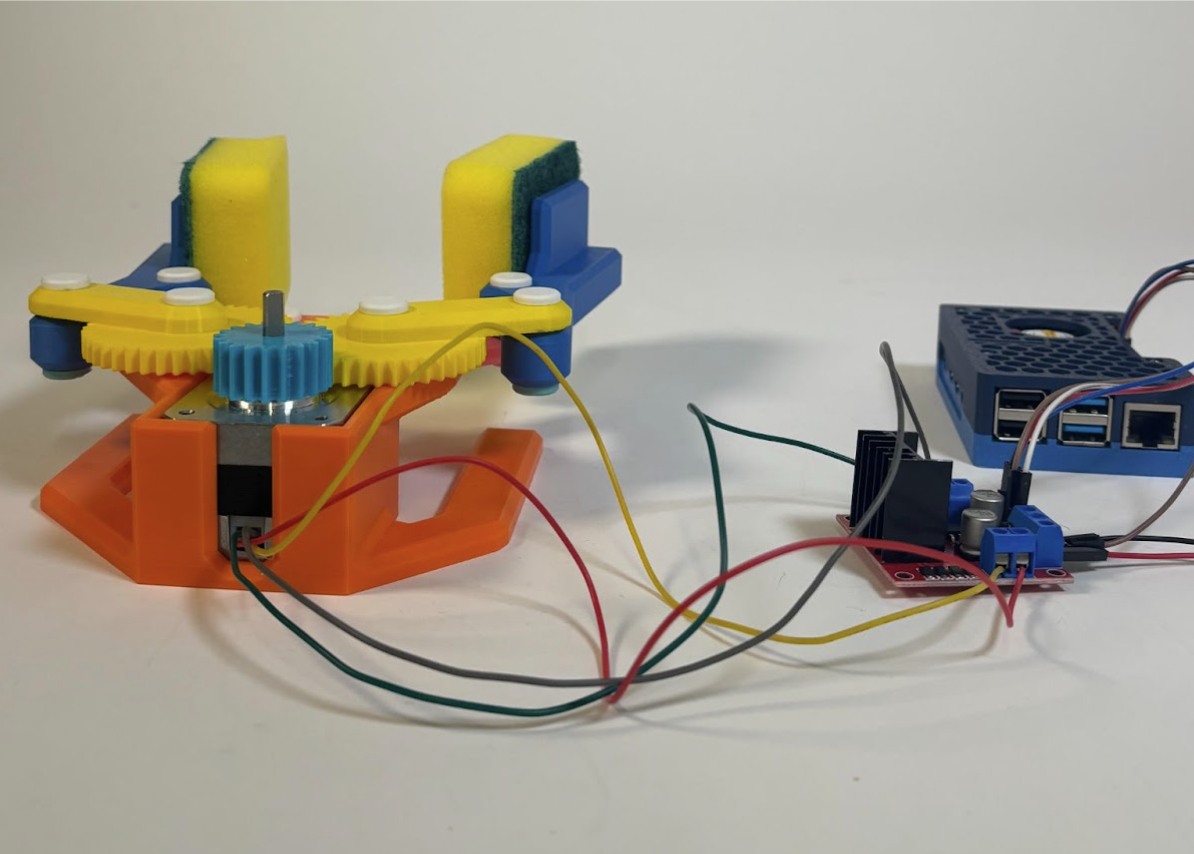
Understanding the Electrical Components Used:
Designed the system around a Raspberry Pi and one stepper motor
Very simple and limited electrical components, the project mostly acted as an introduction to the Raspberry Pi system
Code and Programming
Color-sensing-based code
Two very simple Python scripts were used to control the machine’s gripper
The first script opens the gripper by powering the stepper motor 25 steps clockwise
The second script powers the stepper motor to take 20 steps counterclockwise
Difference in steps ensured that the gripper would always close tightly, preventing any slippage or loose grip on objects
Expected that the robot would be placed with the figure directly in front of the figure
Limited ability to adjust gripping motion
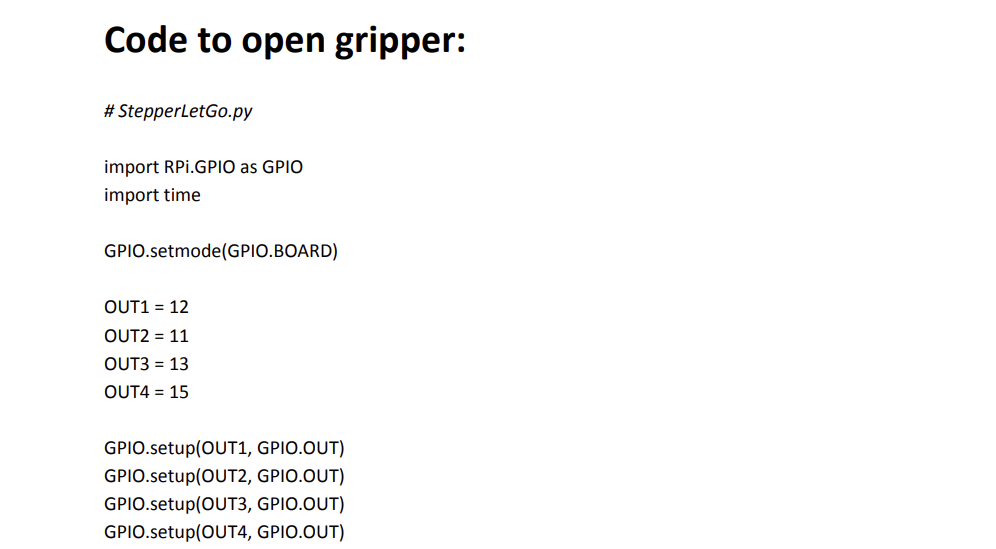
Click to see code
Final Design and Demonstration
The final design includes cut sponges at the end of the gripping arms, which conform to the figure’s angles and contours, improving grip
The robot, largely due to the sponge addition, was able to lift all 8 figures without issue
The design was robust enough to withstand light turbulence or shaking without losing grip of the figure
Gripper Demonstration
Reflection and Takeaways
Takeaways:
Gained practical experience and deepened understanding of how to integrate a Raspberry Pi to control a robotic system
Improved knowledge of mechanical linkages and how to incorporate them effectively within a design to transmit motion
Possible Improvements:
With additional time, the project could incorporate a larger-scale HTML-based interface to control the robot remotely
Such an interface would allow for easier micro-adjustments and more precise operation of the system